In this article I am going to discuss how we can implement asp.net core identity with jwt in web api. In previous article we have discussed how we can implement asp.net core identity with jwt in one class library so we can use this class library with any project without installing identity and jwt packages in our project. To implement asp.net core identity with jwt in web api firstly we have to understand about the Asp.net core identity and JWT. Firstly I want to clear that Identity and JWT are two different concepts. We will be discussing about this in detail.
What is Asp.net Core Identity?
ASP.NET Core Identity is a membership system which allows you to add login functionality to your application. Users can create an account and login with a user name and password or they can use an external login providers such as Facebook, Google, Microsoft Account, Twitter and more. Asp.net core Identity is an api that supports login, signup, email confirmation, reset password, forgot password user interfaces. Basically it manages all the user credentials including their passwords, roles , claims and so many other things. When we use asp.net core identity in our project then automatically it will create some tables which is used to store user details , their roles , roles mappings and the user claims. For installing identity you have to install the package that is discussed below:
Microsoft.AspNetCore.Identity.EntityFrameworkCoreWhat is JWT?
JWT stands for JSON Web Token which is an used to securely transmitting information from one party to another party in the form of JSON object. This information is trusted because it is digitally signed and encrypted using HMAC algorithm. In simple words we can say that JWT is used to check the authentication and authorization of signed user. JWT provides a token which is send with the header to access the api else anyone can access our APIs and this will cause problem for us and it is the invitation for hackers. For installing JWT in our asp.net core identity with jwt class library we need to install the given package.
Microsoft.AspNetCore.Authentication.JwtBearerNote :- In this Project I am going to use the 3 Layer Architecture for development.
What is 3 Layer Architecture?
A three-layer architecture is a client-server architecture in which the functional processes of user interface, business logic and data access layer are developed and maintained as independent modules on separate platforms. The three-layer architecture is a software design pattern and well-established software architecture. Today most of the projects are built on the basis of this 3 layer architecture to optimize their code.
Lets Start by Creating New Project
1. Create new Project.
2. Choose ASP.NET Core Web API and then choose your location and click on create. As we are following three layer architecture. So we have to create three different-2 class libraries which is used to handle separate things.
- First Layer:- It is our abstraction layer which contains all the Entities and ViewModels of request and response type of our project which is used to deal with frontend. ( My first layer name is ImplementIdentity.Common.Abstraction)
- Second Layer:- This layer is also called the Data Access Layer which contains our all database related code. ( My second layer name is ImplementIdentity.Data)
- Third Layer:- This Layer is also called the Business Logic Layer which contains the logic to create different-2 services. (My third layer name is ImplementIdentity.BusinessLogic)
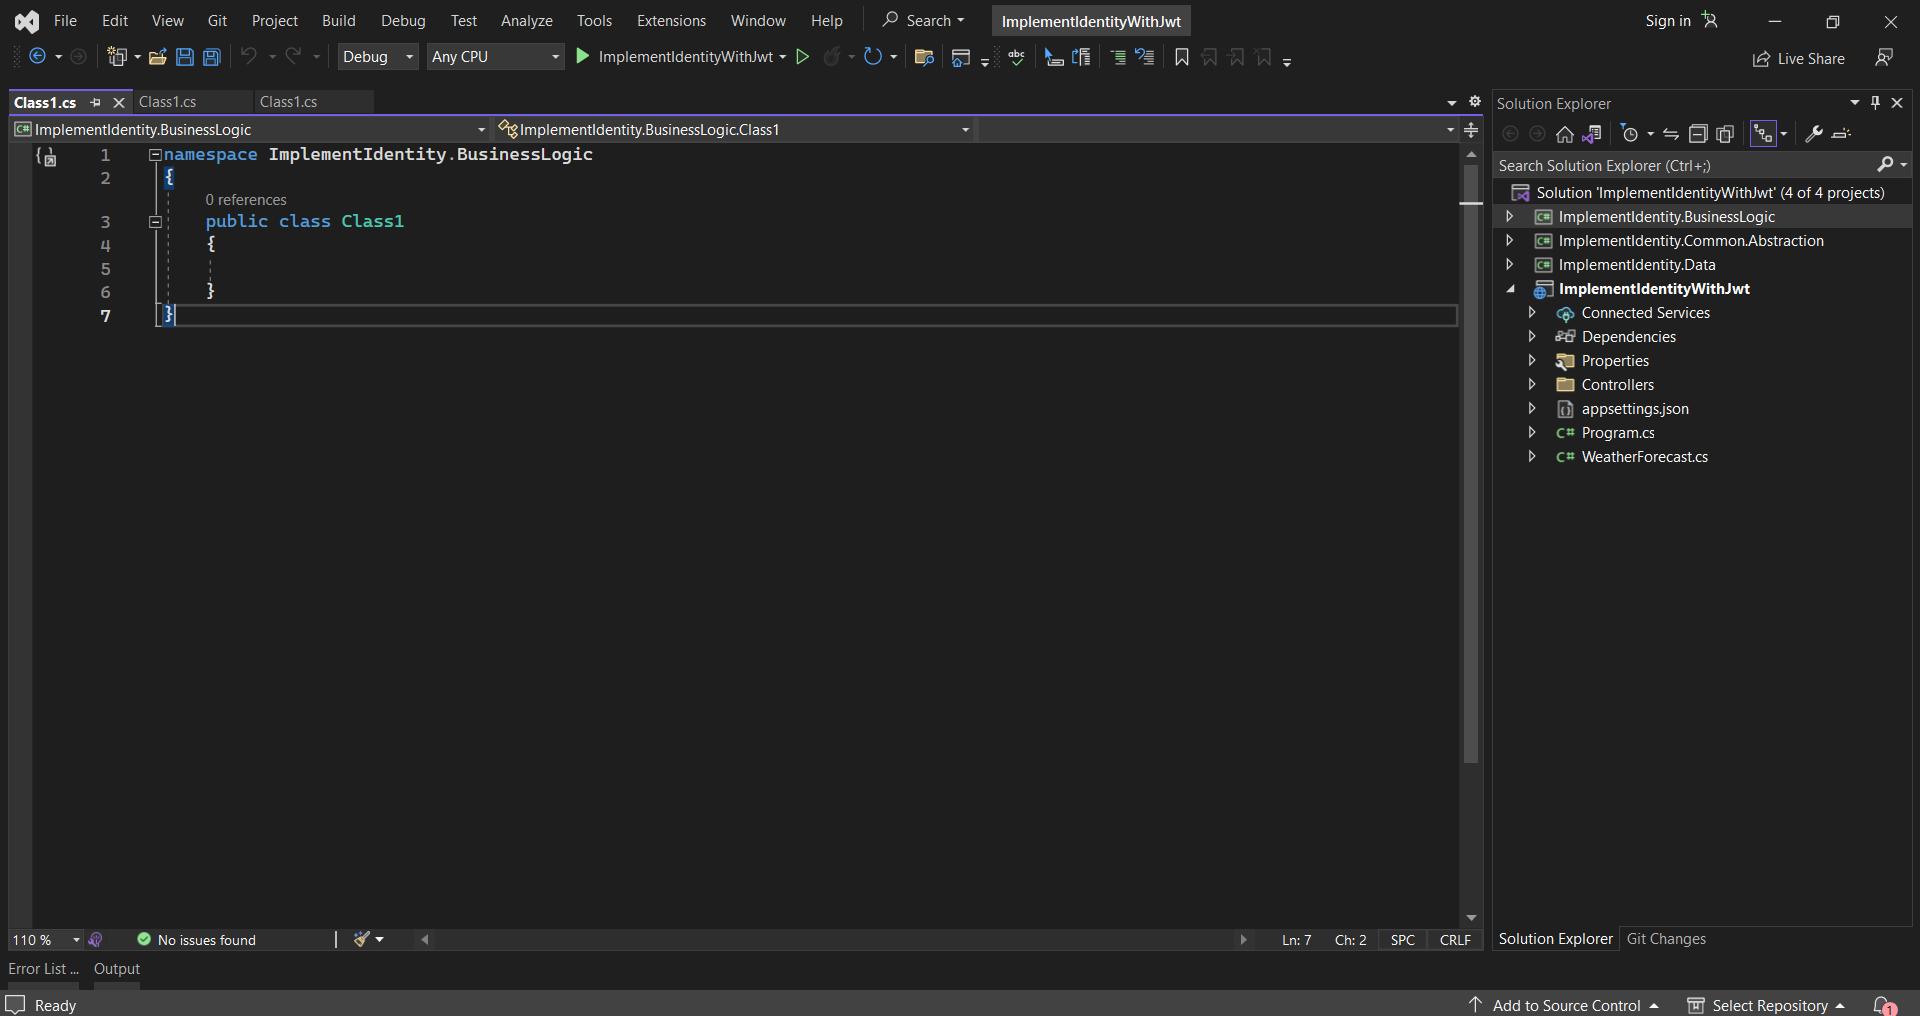
3. If you have added the class libraries then your solution explorer looks like this. And if you don’t know how to create class library then simply follow these steps:
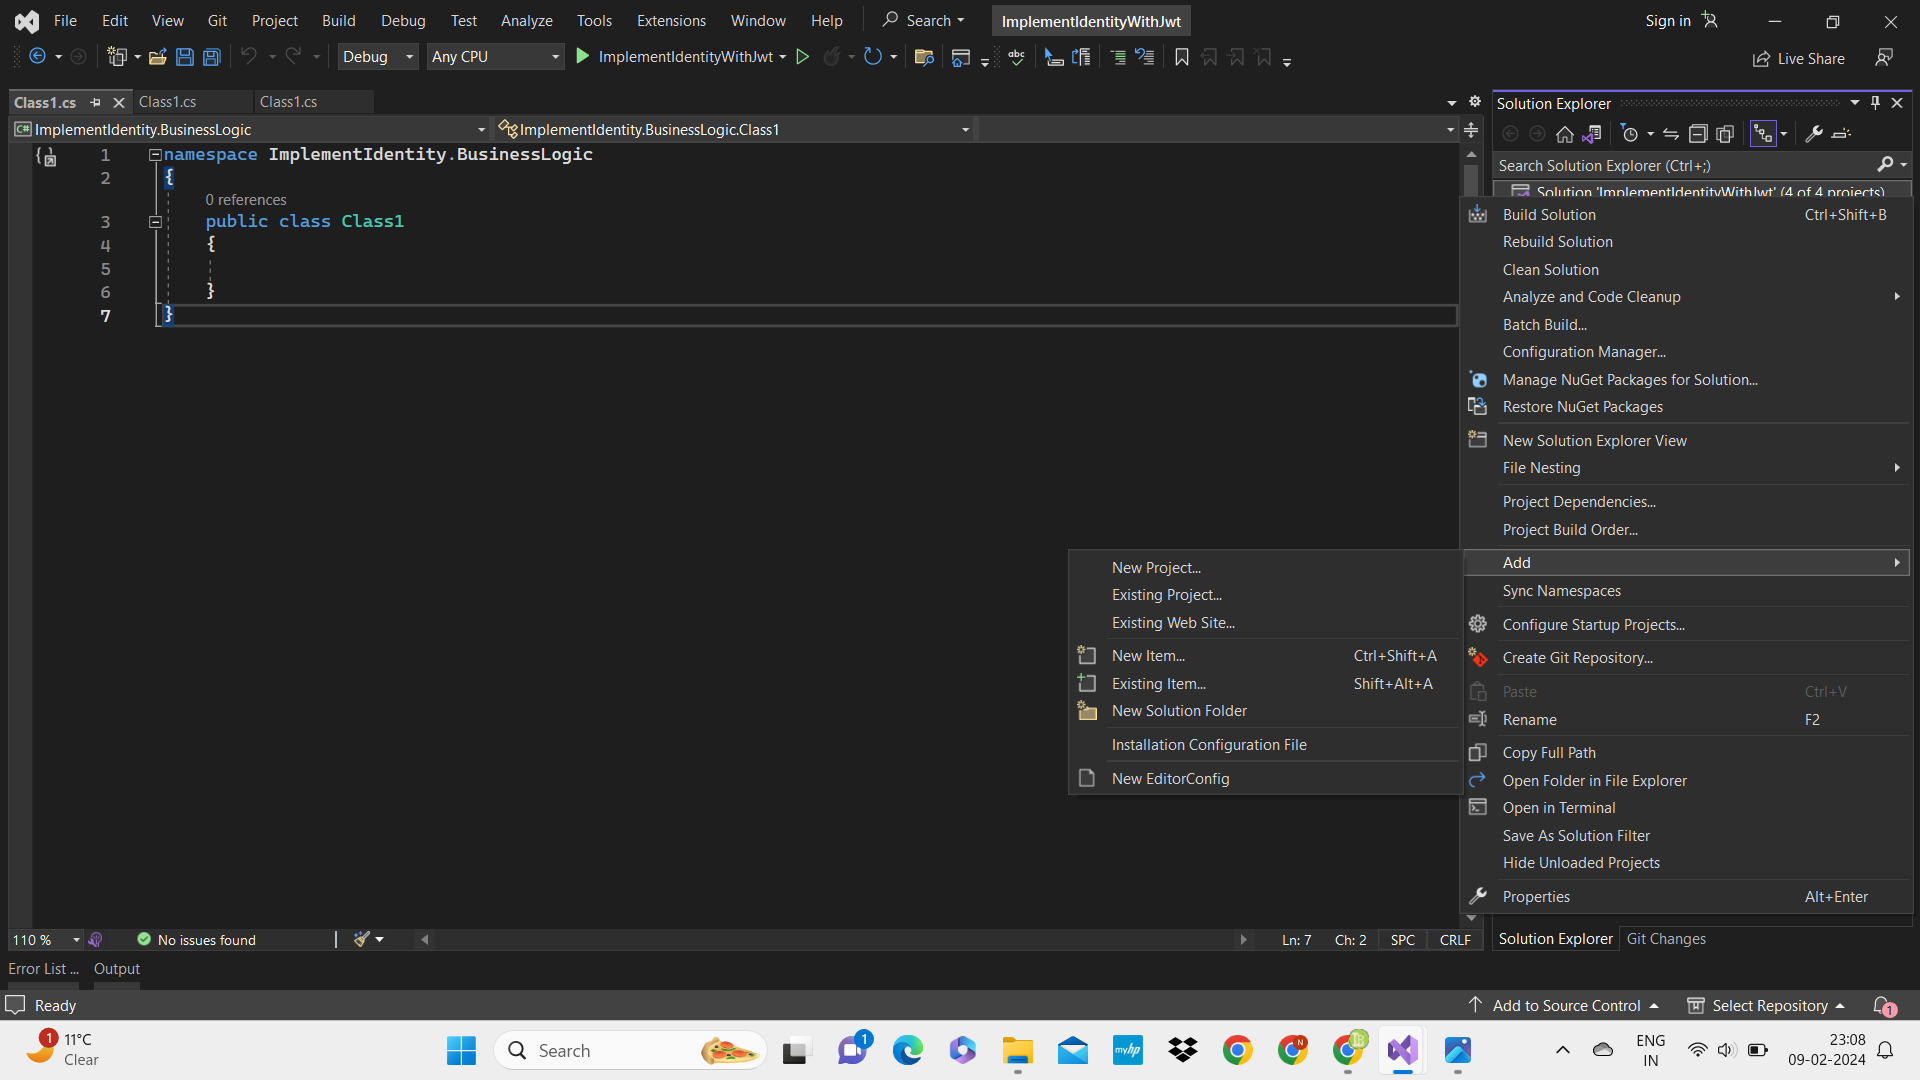
- Right click on Solution ‘ImplementIdentityWithJwt’
- Choose Add<New Project.
- Choose Class Library and name it.
- Same like that you can create three class libraries.
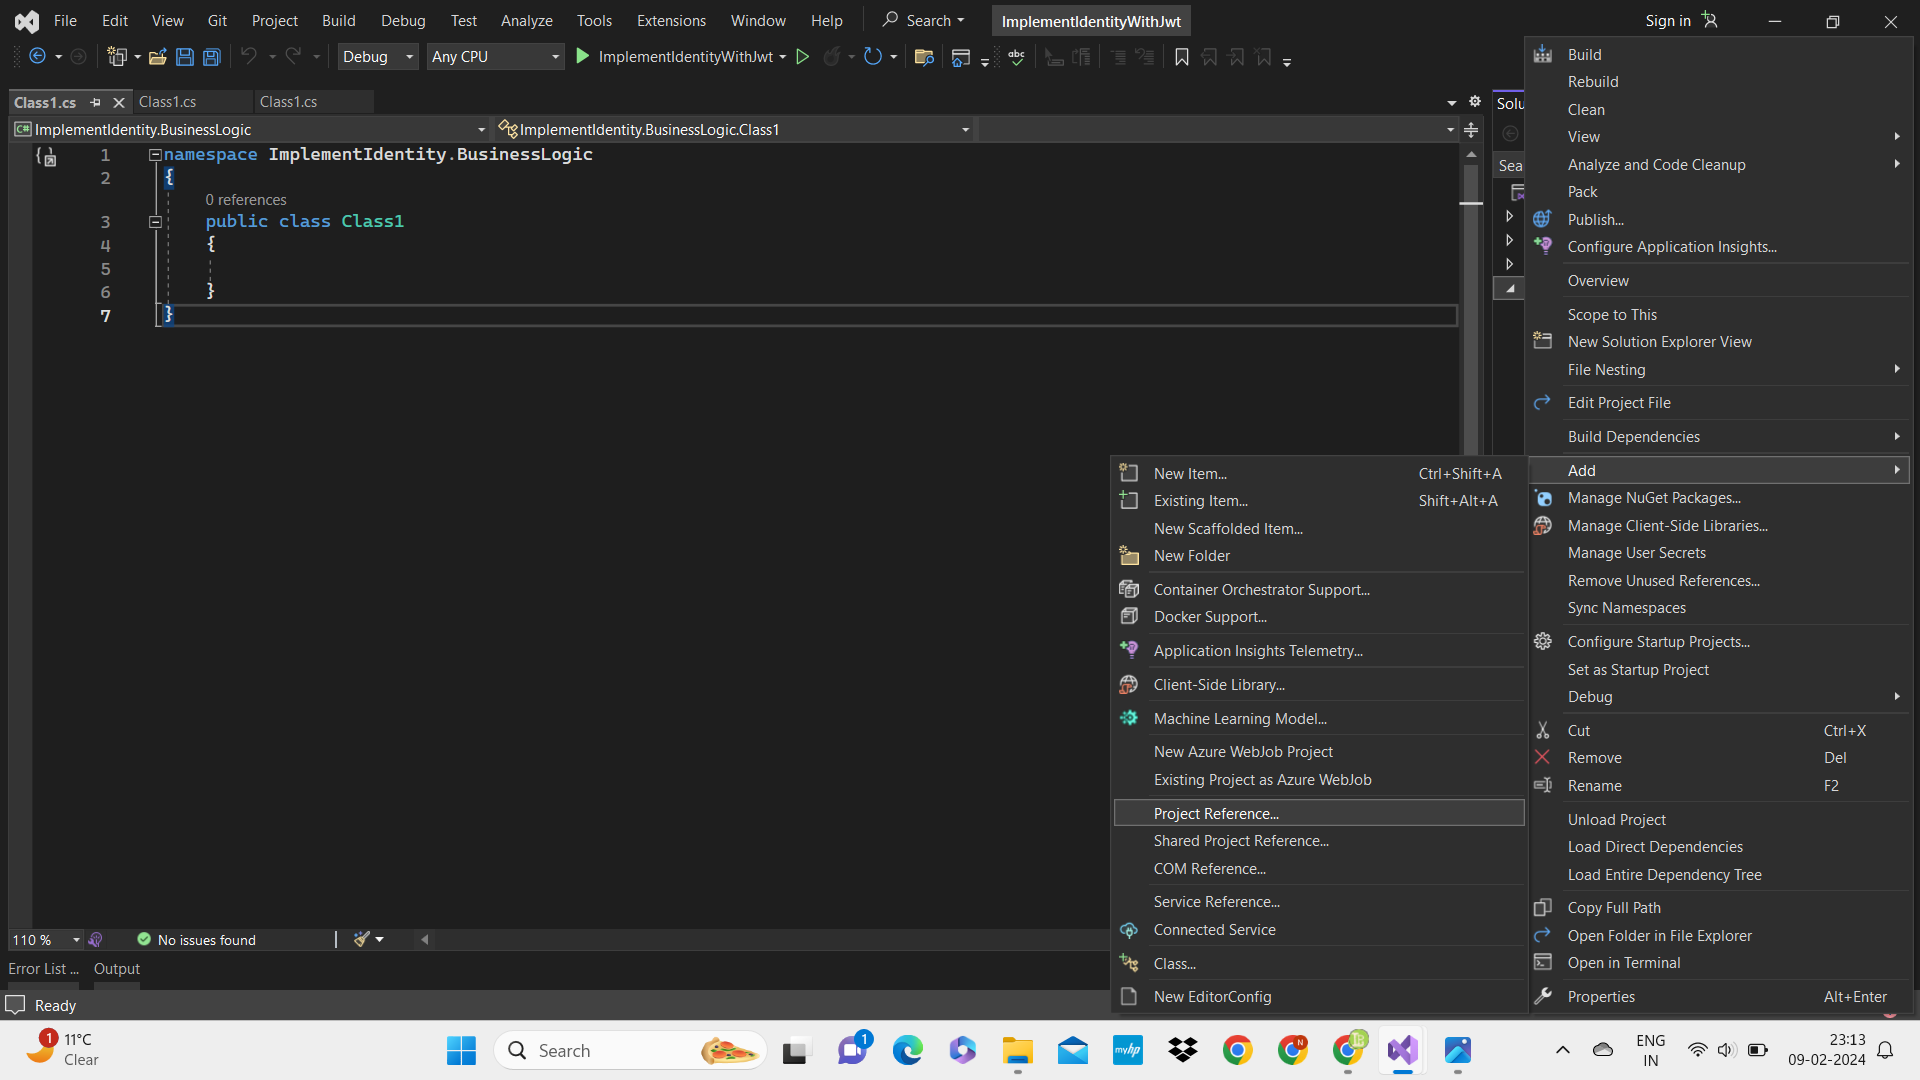
4. Once you have created three class libraries to implement asp.net core identity with jwt in web api you have to add the project reference of these Class libraries into one another. But first of all if you don’t know how to add project reference then simply follow these steps:
- Right click on any project
- Choose Add < Project Reference
- Then mark check on the projects you want to add the reference.
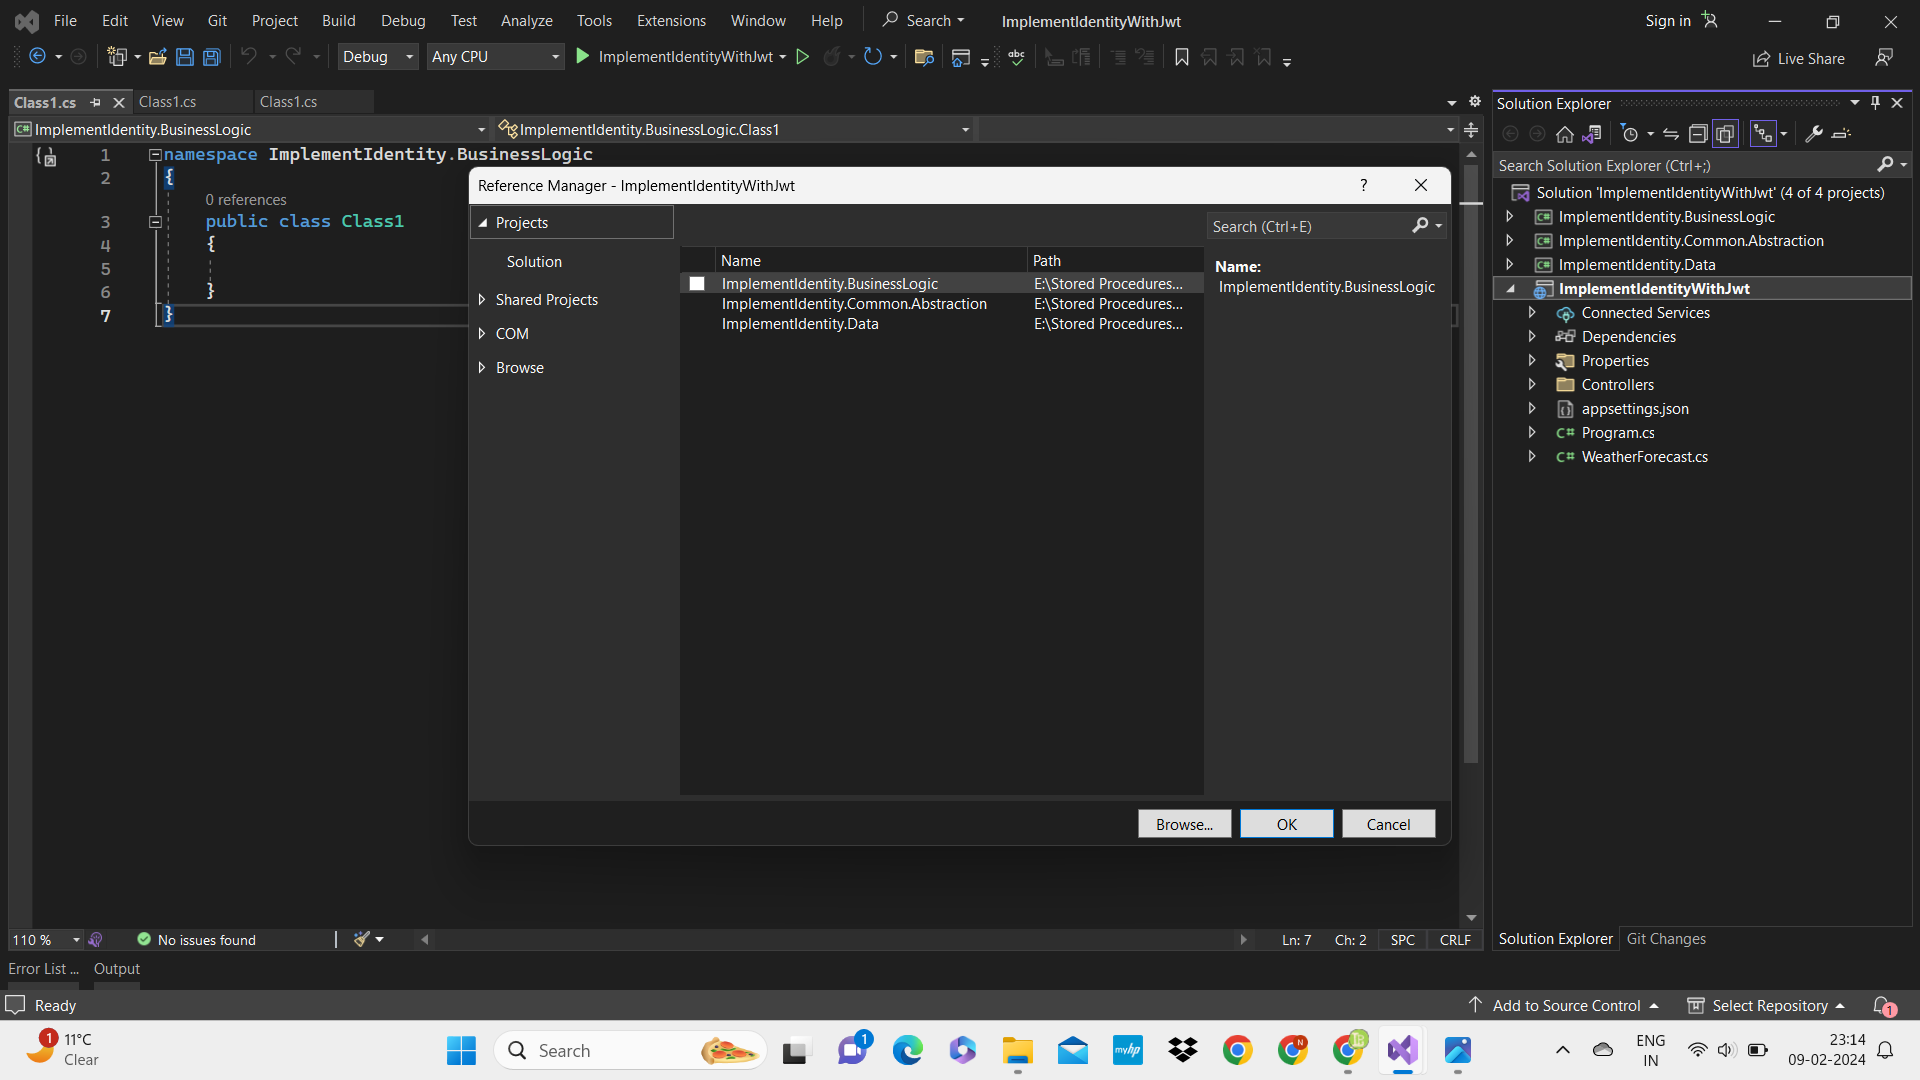
5. Here you need to Focus. Now you have to add the references of each and every project to establish a proper relation between them.
- ImplementIdentity.Common.Abstraction will containing the no reference of any class library.
- ImplementIdentity.Data will containing the reference of ImplementIdentity.Common.Abstraction so we can use the entities in our data class library to add migration.
- ImplementIdentity.BusinessLogic will containing the reference of both ImplementIdentity.Common.Abstraction and ImplementIdentity.Data class libraries because we are also using the repositories from Data access layer and entities or view models from Common layer.
- ImplementIdentityWithJwt which is our web api which will containing the reference of ImplementIdentity.Data and ImplementIdentity.BusinessLogic.
6. Now we have successfully add the references of the projects. After we have install the necessary packages in our project. In ImplementIdentity.Common.Abstraction we have to install this package.
Microsoft.EntityFrameworkCore
Microsoft.AspNetCore.Identity.EntityFrameworkCore
7. In ImplementIdentity.Data we have to install the following packages.
Microsoft.EntityFrameworkCore
Microsoft.EntityFrameworkCore.SqlServer
Microsoft.EntityFrameworkCore.Tools
Microsoft.AspNetCore.Authentication.JwtBearer
8. In ImplementIdentity.BusinessLogic we don’t have to install any necessary package but if you are implementing something then you can add any package by installing it.
9. In ImplementIdentityWithJwt web api we have to install the following packages.
Microsoft.EntityFrameworkCore
Microsoft.EntityFrameworkCore.SqlServer
Microsoft.EntityFrameworkCore.Design
Now we have installed all packages and added all references of projects. so we are going to add the main code to implement asp.net core identity with jwt in web api. First we see how we can add identity.
Implementation of Asp.net Core Identity with Jwt in Web api
Implementation of Asp.net Identity
1. Add Entity folder and View Model folder in ImplementIdentity.Common.Abstraction to create entities and view models of response and request type. In Entities folder add one class with name of ApplicationUser which inherits the IdentityUser.
//This is totally optional if you directly want to use IdentityUser you can
public class ApplicationUser:IdentityUser
    {
        public string FirstName { get; set; }
        public string LastName { get; set; }
    }
2. Now In the View Models Folder under ImplmentIdentity.Common.Abstraction add the following classes.
public class LoginRequestViewModel
    {
        public string Email { get; set; }
        public string Password { get; set; }

    }

public class LoginResponseViewModel
    {
        public string UserId { get; set; }
        public string UserName { get; set; }
        public bool IsSuccessFul { get; set; }
        public string Token { get; set; }
        public string Email { get; set; }
        public string Role { get; set; }
        public string? Message { get; set; }
    }

public class SignUpRequestViewModel
    {
        public string FirstName { get; set; }
        public string LastName { get; set; }
        public string UserName { get; set; }
        public string Email { get; set; }
        [Required]
        [DataType(DataType.Password)]
        public string Password { get; set; }
        [Required]
        [Compare("Password")]
        public string ConfirmPassword { get; set; }
    }
3. Now In ImplementIdentity.Data Class library add one folder with name of Data and add one class with name of AppDbContext and copy the following code and paste in your AppDbContext.
//if you are using Identity User then you use IdentityUser
public class AppDbContext:IdentityDbContext<ApplicationUser>
    {
        public AppDbContext(DbContextOptions<AppDbContext> options) : base(options)
        {

        }

        protected override void OnModelCreating(ModelBuilder builder)
        {
            base.OnModelCreating(builder);
            this.SeedUsers(builder);
            this.SeedRoles(builder);
            this.SeedUserRoles(builder);
        }

        private void SeedUsers(ModelBuilder builder)
        {
            builder.Entity<ApplicationUser>().HasData(
                new ApplicationUser()
                {
                    FirstName="Admin",
                    LastName="User",
                    Id = "b74ddd14-6340-4840-95c2-db12554843e5",
                    UserName = "Admin",
                    Email = "admin@gmail.com",
                    NormalizedUserName = "Admin",
                    NormalizedEmail = "admin@gmail.com",
                    LockoutEnabled = false,
                    PhoneNumber = "1234567890",
                    PasswordHash = new PasswordHasher<ApplicationUser>().HashPassword(null, "Admin@123")
                },
                new ApplicationUser()
                {
                    FirstName="Normal",
                    LastName="User",
                    Id = "F7A13C3E-EB62-4193-9653-CB3BB571DADF",
                    UserName = "User",
                    Email = "user@gmail.com",
                    NormalizedUserName = "User",
                    NormalizedEmail = "user@gmail.com",
                    LockoutEnabled = false,
                    PhoneNumber = "1234567890",
                    PasswordHash = new PasswordHasher<ApplicationUser>().HashPassword(null, "User@123")
                });
        }

        private void SeedRoles(ModelBuilder builder)
        {
            builder.Entity<IdentityRole>().HasData(
                new IdentityRole() { Id = "fab4fac1-c546-41de-aebc-a14da6895711", Name = "Admin", ConcurrencyStamp = "1", NormalizedName = "Admin" },
                new IdentityRole() { Id = "c7b013f0-5201-4317-abd8-c211f91b7330", Name = "User", ConcurrencyStamp = "2", NormalizedName = "User" }
                );
        }

        private void SeedUserRoles(ModelBuilder builder)
        {
            builder.Entity<IdentityUserRole<string>>().HasData(
              new IdentityUserRole<string>() { RoleId = "fab4fac1-c546-41de-aebc-a14da6895711", UserId = "b74ddd14-6340-4840-95c2-db12554843e5" },
              new IdentityUserRole<string>() { RoleId = "c7b013f0-5201-4317-abd8-c211f91b7330", UserId = "F7A13C3E-EB62-4193-9653-CB3BB571DADF" }
            );
        }
    }
you can also customize Identity. For e.g if you want to add some more fields in IdentityUser class then you can create your own class and inherit by IdentityUser to add more fields. Now open package manager console and write that commands.
add-migration migrationName       //migrationName is any name
//then
update-database     // with this all identity tables will create in your database.
But before using migration don’t forget to add your connectionString in your appsettings.json file in your api and inject identity services in Program.cs. Like
//appsettings.json

{
  "Logging": {
    "LogLevel": {
      "Default": "Information",
      "Microsoft.AspNetCore": "Warning"
    }
  },
  "AllowedHosts": "*",
  "ConnectionStrings": {
    "DefaultConnection": "Server=(localdb)\\MSSQLLocalDB;Database=ImplementIdentityWithJWT;Trusted_Connection=True;MultipleActiveResultSets=true"
  },

}

//Program.cs

builder.Services.AddDbContext<AppDbContext>
    (options => options.UseSqlServer(builder.Configuration.GetConnectionString("DefaultConnection")));

builder.Services.AddIdentity<ApplicationUser, IdentityRole>()
    .AddEntityFrameworkStores<AppDbContext>()
    .AddDefaultTokenProviders();
With this you have successfully add the identity tables in your database now its time to add the JWT and use the login and signup with JWT authentication and authorization.
Implementation of JWT
1. For implementing JWT first of all you have to add the JWT details in your appsettings.json like
{
  "Logging": {
    "LogLevel": {
      "Default": "Information",
      "Microsoft.AspNetCore": "Warning"
    }
  },
  "AllowedHosts": "*",
  "ConnectionStrings": {
    "DefaultConnection": "Server=(localdb)\\MSSQLLocalDB;Database=ImplementIdentityWithJWT;Trusted_Connection=True;MultipleActiveResultSets=true"
  },
  "JWT": {
    "ValidAudience": "abcdefghijk",
    "ValidIssuer": "abcdef",
    "Secret": "mikdpclabtechmsdfis"
  }
}
2. After doing that you have to add jwt authentication in your program.cs file. Like
builder.Services.AddAuthentication(options =>
{
    options.DefaultAuthenticateScheme = JwtBearerDefaults.AuthenticationScheme;
    options.DefaultChallengeScheme = JwtBearerDefaults.AuthenticationScheme;
    options.DefaultScheme = JwtBearerDefaults.AuthenticationScheme;
}).AddJwtBearer(o =>
{
    o.TokenValidationParameters = new TokenValidationParameters
    {
        ValidIssuer = builder.Configuration["Jwt:ValidIssuer"],
        ValidAudience = builder.Configuration["Jwt:ValidAudience"],
        IssuerSigningKey = new SymmetricSecurityKey
    (Encoding.UTF8.GetBytes(builder.Configuration["Jwt:Secret"])),
        ValidateIssuer = true,
        ValidateAudience = true,
        ValidateLifetime = false,
        ValidateIssuerSigningKey = true
    };
})

//this is used to add Authorize button in Swagger api to check whether the token is //valid or not
builder.Services.AddSwaggerGen(options =>
{
    options.SwaggerDoc("v1", new Microsoft.OpenApi.Models.OpenApiInfo { Title = "ImplementIdentityWithJWT", Version = "V1" });
    options.AddSecurityDefinition("Bearer", new OpenApiSecurityScheme
    {
        In = ParameterLocation.Header,
        Name = "Authorization",
        Type = SecuritySchemeType.Http,
        BearerFormat = "JWT",
        Scheme = "Bearer",

    });
    options.AddSecurityRequirement(new OpenApiSecurityRequirement
    {
        {
            new OpenApiSecurityScheme
            {
                Reference=new OpenApiReference
                {
                    Type=ReferenceType.SecurityScheme,
                    Id="Bearer"
                }
            },
            new string[]{}
        }
    });
});
3. Now we have injected the jwt authentication in our web api. So lets create the Repository and IRepository folder under ImplementIdentity.Data.
IRepository
This folder will containing all the interfaces for the repositories.
public interface ILoginRepository
    {
        Task<LoginResponseViewModel> Login(LoginRequestViewModel loginModel);
        Task<bool> SignUp(SignUpRequestViewModel model);
    }
Repository
This folder will containing the implementation of all IRepository interfaces
public class LoginRepository:ILoginRepository
    {
        private readonly UserManager<ApplicationUser> _userManager;
        private readonly RoleManager<IdentityRole> _roleManager;
        private readonly SignInManager<ApplicationUser> _signInManager;
        private readonly IConfiguration _configuration;
        public LoginRepository(UserManager<ApplicationUser> userManager, RoleManager<IdentityRole> roleManager, SignInManager<ApplicationUser> signInManager, IConfiguration configuration)
        {
            _userManager = userManager;
            _roleManager = roleManager;
            _signInManager = signInManager;
            _configuration = configuration;
        }

        public async Task<LoginResponseViewModel> Login(LoginRequestViewModel model)
        {
            var user = await _userManager.FindByEmailAsync(model.Email);
            if (user != null && await _userManager.CheckPasswordAsync(user, model.Password))
            {
                var userRoles = await _userManager.GetRolesAsync(user);

                var authClaims = new List<Claim>
                    {
                    new Claim(ClaimTypes.Name, user.UserName),
                    new Claim(JwtRegisteredClaimNames.Jti, Guid.NewGuid().ToString()),
                    };

                foreach (var userRole in userRoles)
                {
                    authClaims.Add(new Claim(ClaimTypes.Role, userRole));
                }

                authClaims.Add(new Claim("UserId", user.Id));
                var authSigningKey = new SymmetricSecurityKey(Encoding.UTF8.GetBytes(_configuration["JWT:Secret"]));

                var token = new JwtSecurityToken(
                    issuer: _configuration["JWT:ValidIssuer"],
                    audience: _configuration["JWT:ValidAudience"],
                    expires: DateTime.Now.AddHours(3),
                    claims: authClaims,
                    signingCredentials: new SigningCredentials(authSigningKey, SecurityAlgorithms.HmacSha256)
                    );

                return new LoginResponseViewModel
                {
                    Token = new JwtSecurityTokenHandler().WriteToken(token),
                    IsSuccessFul = true,
                    Role = userRoles[0].ToString(),
                    UserName = user.UserName,
                    UserId = user.Id,
                    Email = user.Email,
                };

            }
            return new LoginResponseViewModel
            {
                IsSuccessFul = false,
                Message = "Not Found",
            };
        }

        public async Task<bool> SignUp(SignUpRequestViewModel model)
        {
            try
            {
                var userExist = await _userManager.FindByEmailAsync(model.Email);
                if (userExist != null)
                {
                    return false;
                }
                else
                {
                    var user = new ApplicationUser
                    {
                        UserName = model.UserName,
                        FirstName = model.FirstName,
                        LastName = model.LastName,
                        Email = model.Email
                    };
                    await _userManager.CreateAsync(user, model.Password);
                    await _userManager.AddToRoleAsync(user, "User");
                    return true;
                }
            }
            catch (Exception ex)
            {
                throw;
            }
        }
    }
4. Now we have to call the repository in ImplementIdentity.BusinessLogic Class library. So in order to call the above repositories we have to create two folder with the name of Contract and Services.
Contracts
This folder will containing all the interfaces for the services
public interface IAccountService
    {
        Task<LoginResponseViewModel> Login(LoginRequestViewModel loginModel);
        Task<bool> SignUp(SignUpRequestViewModel model);
    }
Services
This folder will containing all the implementations for the Contract’s interfaces.
public class AccountService:IAccountService
    {
        private readonly ILoginRepository loginRepository;

        public AccountService(ILoginRepository loginRepository)
        {
            this.loginRepository = loginRepository;
        }

        public async Task<LoginResponseViewModel> Login(LoginRequestViewModel loginModel)
        {
            try
            {
                var res=await loginRepository.Login(loginModel);
                return res;
            }
            catch (Exception ex)
            {
                throw;
            }
        }

        public async Task<bool> SignUp(SignUpRequestViewModel model)
        {
            try
            {
                var res=await loginRepository.SignUp(model);
                return res;
            }
            catch (Exception ex)
            {
                throw;
            }
        }
    }
5. Now we have inject the repository and services in our Program.cs
builder.Services.AddScoped<IAccountService, AccountService>();
builder.Services.AddScoped<ILoginRepository, LoginRepository>();
6. At last we have to create one controller in the ImplementIdentityWithJwt web api in which we will be calling the account service to call the login and signup method.
    [Route("api/[controller]")]
    [ApiController]
    public class AccountController : ControllerBase
    {
        private readonly IAccountService _accountService;

        public AccountController(IAccountService accountService)
        {
            _accountService = accountService;
        }

        [HttpPost("login")]
        public async Task<IActionResult> Login(LoginRequestViewModel model)
        {
            try
            {
                var res = await _accountService.Login(model);
                if (res.IsSuccessFul == true)
                {
                    return Ok(res);
                }
                else
                {
                    return BadRequest(res.Message);
                }
            }
            catch (Exception ex)
            {
                return BadRequest(ex.Message + " at login");
            }
        }

        [HttpPost("signUp")]
        public async Task<IActionResult> SignUp(SignUpRequestViewModel model)
        {
            try
            {
                var res = await _accountService.SignUp(model);
                if (res == true)
                {
                    return Ok("User Created Successfully");
                }
                else
                {
                    return BadRequest("User not created!");
                }

            }
            catch (Exception ex)
            {
                return BadRequest(ex.Message + " at signUp");
            }
        }
    }
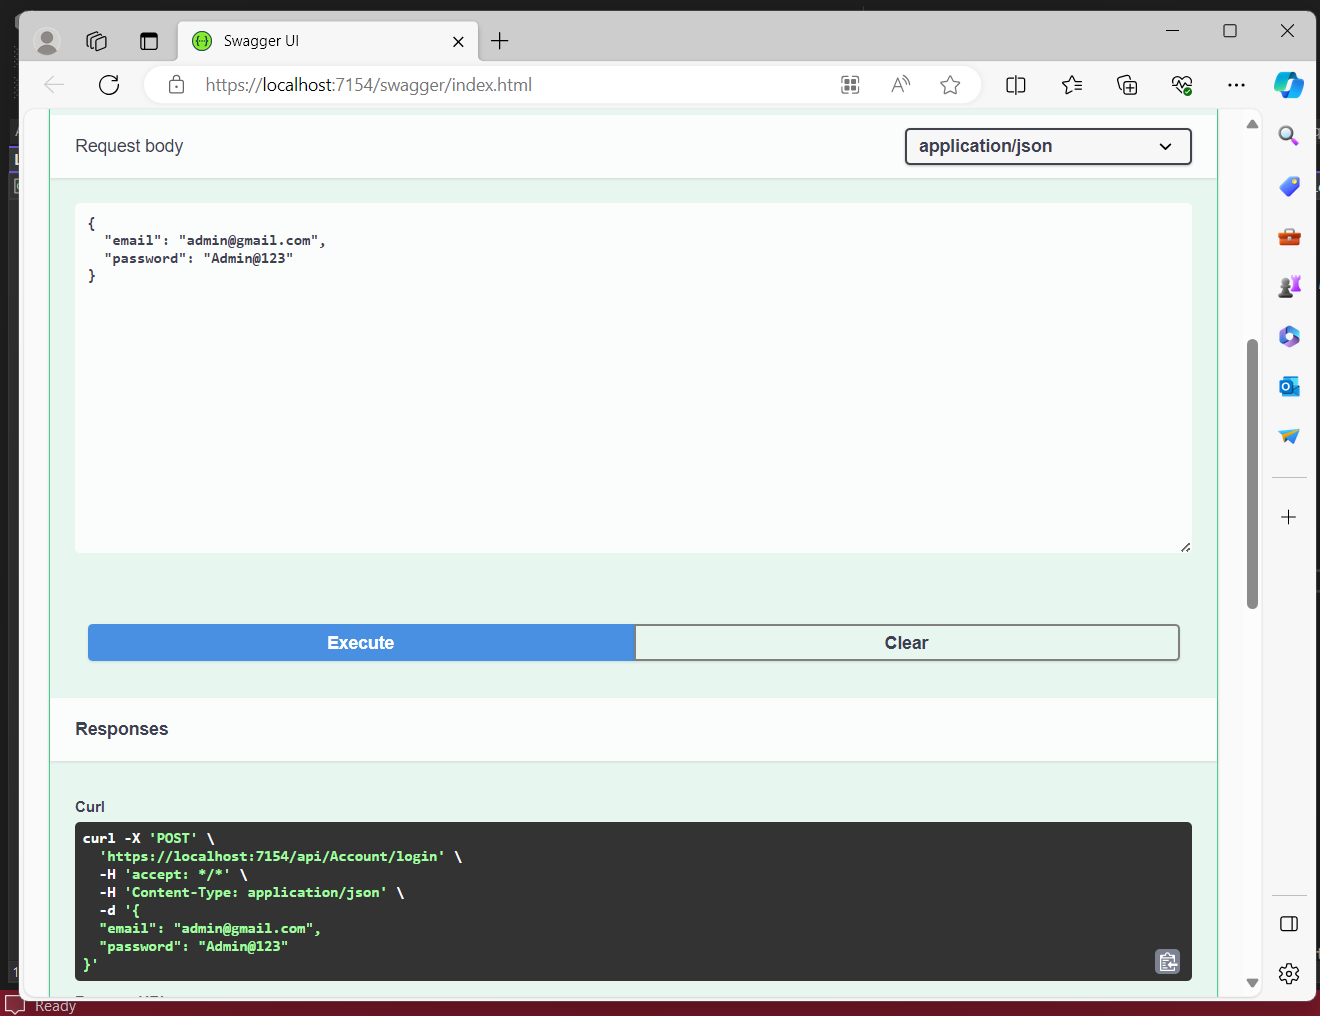
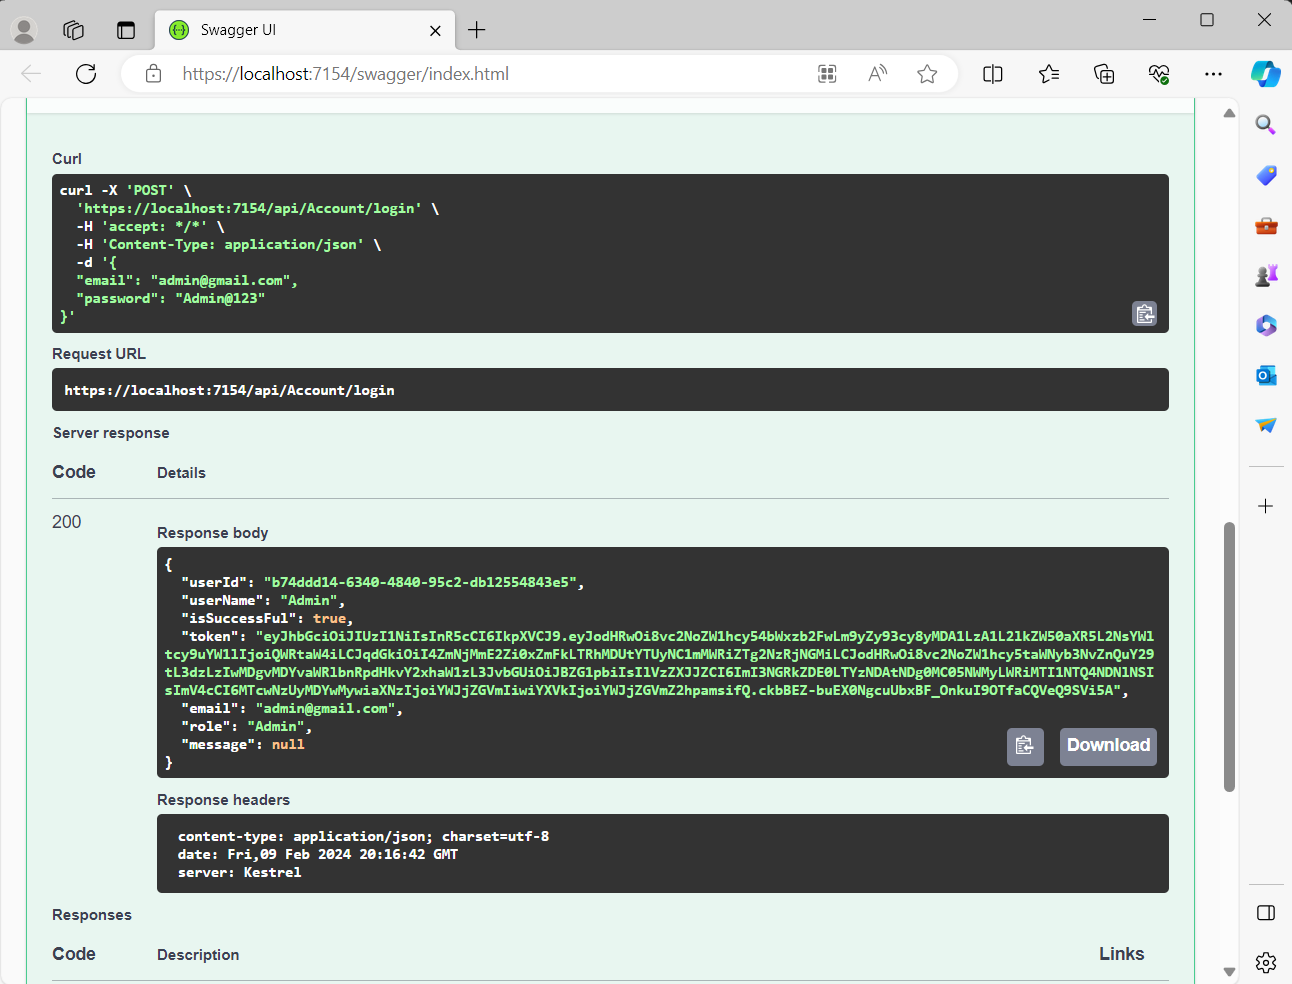
7. You can see how it is generating the token when we fill the credentials.
Conclusion
We have successfully implement Asp.net core Identity with jwt in web api but if want to implement this whole thing in separate class library then you can read this article. You can try this at your end and if you want the whole source code of how to implement Asp.net core identity with jwt in web api then you can download the whole code from the give link. In my next article I am going to discuss how to do email confirmation with asp.net core identity in web API.