In this article I am going to discuss about the email confirmation with asp.net core identity in web api. In my previous article I have discussed how to implement asp.net core Identity with jwt in web api. Before implementing email confirmation with asp.net core identity we must have to know why the email confirmation is important.
Why Email Confirmation is Important?
Today email confirmation is important in securing online accounts and verifying the user’s identity. For example if user sign up his account and while creating he typed the email address wrong by mistake but after sometime he forget his password and tries to reset his password but the reset password link is sent to the wrong email address and where the link will send that user tries to change password and there your account has been hacked. Therefore email confirmation is important for every user. Here are some other key reasons why email confirmation is essential:
- Verification of Identity: With doing email confirmation user ensures that the email address provided belongs to the person.
- Verifying the Email Address: Email confirmation ensures that email address provided by the user is valid and accessible. This also proves when user forgets his password and want to reset his password.
- Account Recovery: As I told if the email is confirmed then the user will easily recover his account. Confirmed email addresses ensure that the recovery process is secure and that only the authenticate account owner can reset their password.
- Improves Data Quality: For applications where the quality of user data is important, confirming email addresses helps ensure that the data collected is accurate and reliable. This is especially important for businesses that totally depends on email communication with their customers.
- Security: Email confirmation acts as a first step in securing user accounts. This is important because the email address often serves as a primary means of communication and identity verification.
How to do Email Confirmation with Asp.net core Identity
For doing email confirmation with asp.net core identity in web api you have to create an email service which is used to send confirmation link. For creating email service there is one condition and the condition is that you must have one email account with 2 step verification. If your email account has 2 step verification on then you have to generate your app password by clicking on 2 step verification. Once your app password is generate copy the password and save it somewhere. Now lets create an email service.
Create an Email Service
For creating an email service you will have to create two different files with the name of IEmailService and Email Service respectively. So first create one interface with the name of IEmail Service and copy the following code.
 public interface IEmailService
    {
        Task SendEmailAsync(string toEmail, string subject, string body,bool isBodyHTML);
    }
After creating the interface you have to create one class with the name of EmailService which implements IEmailService and copy the following code.
public class EmailService : IEmailService
    {
        private readonly IConfiguration _config;

        public EmailService(IConfiguration config)
        {
            _config = config;
        }
        public Task SendEmailAsync(string toEmail, string subject, string body, bool isBodyHTML)
        {
            string MailServer = _config["EmailSettings:MailServer"];
            string FromEmail = _config["EmailSettings:FromEmail"];
            string Password = _config["EmailSettings:Password"];
            int Port = int.Parse(_config["EmailSettings:MailPort"]);

            var client = new SmtpClient(MailServer, Port)
            {
                Credentials = new NetworkCredential(FromEmail, Password),
                EnableSsl = true,
            };
            MailMessage mailMessage = new MailMessage(FromEmail, toEmail, subject, body)
            {
                IsBodyHtml = isBodyHTML
            };
            return client.SendMailAsync(mailMessage);
        }
    }
Now we have created the email service but this is useless until and unless we did not use the email Id and the password which you have generated by clicking on 2 step verification on your google account. After generating your password just modify your details accordingly and paste in the appsettings.json like given below:
  "EmailSettings": {
    "MailServer": "smtp.gmail.com",
    "MailPort": 587,
    "SenderName": "YourName",
    "FromEmail": "yourEmail@gmail.com",
    "Password": "YourPassword"
  },
After writing the credentials into the appsettings.json you have to inject the email service in the program.cs to use that service. Like
builder.Services.AddTransient<IEmailService, EmailService>();Sending Email Confirmation link with Asp.net core Identity
As we have successfully created the email service then its time to use that service to send the email confirmation with asp.net core identity. Now here question arieses why email confirmation with asp.net core identity? The answer is because Asp.net core identity provides inbuilt mechanism of storing users with confirmed email in the form of column in the AspNetUsers column in the database.
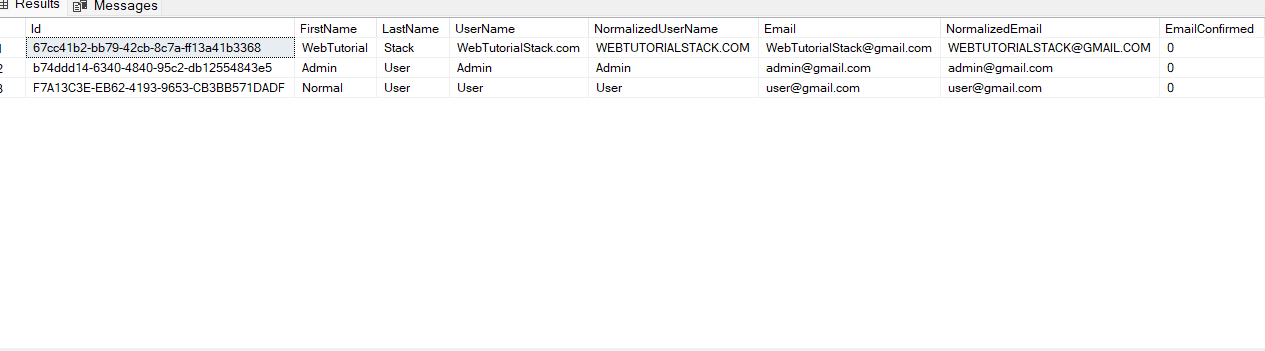
You can see from above image AspNetUsers table in identity provides one column with the name of EmailConfirmed which is currently 0 which means the user has not confirmed his email. But once when user confirm his email then this property is going to set 1.
How to send Confirmation link?
For sending confirmation link when user register himself in your application you have to modify your signup method like give below:
private readonly IEmailService _emailService;
//Don't forget to use IEmailService in your constructor to use email service

public async Task<SignUpConfirmationResponseViewModel> SignUp(SignUpRequestViewModel model)
        {
            try
            {
                var userExist = await _userManager.FindByEmailAsync(model.Email);
                if (userExist != null)
                {
                    return new SignUpConfirmationResponseViewModel
                    {
                        IsCreated = false,
                    };
                }
                else
                {
                    var user = new Users
                    {
                        UserName = model.UserName,
                        FirstName = model.FirstName,
                        LastName = model.LastName,
                        Email = model.Email
                    };
                    await _userManager.CreateAsync(user, model.Password);
                    await _userManager.AddToRoleAsync(user, "User");
                    await SendConfirmationEmail(model.Email, user);
                    return new SignUpConfirmationResponseViewModel
                    {
                        IsCreated = true,
                    };
                }
            }
            catch (Exception ex)
            {
                throw;
            }
        }

private async Task SendConfirmationEmail(string? email, Users? user)
        {
          var token = await _userManager.GenerateEmailConfirmationTokenAsync(user);
          var confirmationLink = $"http://localhost:3000/confirm-email?UserId={user.Id}&Token={token}";
          await _emailService.SendEmailAsync(email, "Confirm Your Email", $"Please confirm your account by <a href='{confirmationLink}'>clicking here</a>;.", true);
        }

//SignUpConfirmationResponseViewModel
public class SignUpConfirmationResponseViewModel
    {

      public bool IsCreated { get; set; }
    }
In above code we have modify the SignUp method to send Confirmation Email after the user is created. After creating the user and adding the role of user we have call our inbuild method SendConfirmationEmail where we have generated the emailConfirmationToken through GenerateEmailConfirmationTokenAsync() which takes one parameter which is of User type. After generating token I have made my frontend url where I want to redirect the user when he click on email confirmation link. At last we are sending email through our email service. Remember you can modify your email service with the required parameters you want to send.
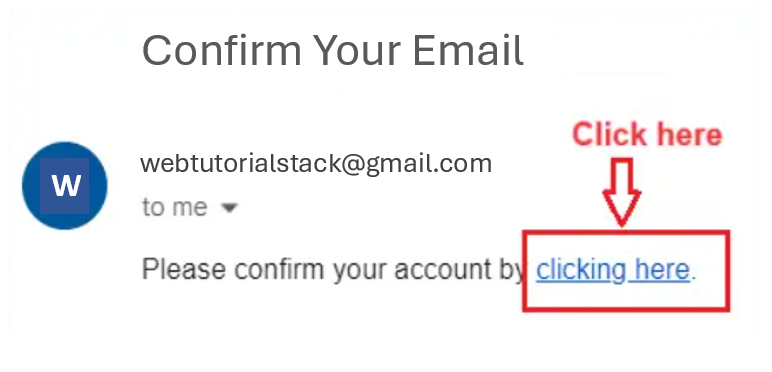
How to Confirm Your Email?
When you click on above link you have to call one method to confirm your email which takes two parameters userId and token which you can get from the query parameter from your confirm-email url. you have to call this method dynamically so confirmEmail function get called automatically. You can call this method with so many ways. As I have used the frontend framework therefore I have called like this way but if you are using asp.net core mvc then you can call this method by using UrlHelper which takes Controller name, action name and many more as parameter.
public async Task<String> ConfirmEmail(string userId, string token)
        {
            var user = await _userManager.FindByIdAsync(userId);
            if (userId == null || token == null)
            {
                return "Link expired";
            }
            else if (user == null)
            {
                return "User not Found";
            }
            else
            {
                token = token.Replace(" ", "+");
                var result = await _userManager.ConfirmEmailAsync(user, token);
                if (result.Succeeded)
                {
                    return "Thank you for confirming your email";
                }
                else
                {
                    return "Email not confirmed";
                }

            }
        }
In above code first of all it checks whether the user or token is null or not if not then it will confirm your email but before that you can see I have replaced the white space with ‘+’ symbol from token. This is done because when we send query parameter value from frontend it will treat the symbol with white space therefore we have again manually replace the white space with the ‘+’ symbol in our backed in order to get the right token.
After Email Confirmation
After this function executes you see that your email is confirmed and the user is redirected to your confirmation link url page which is given at the time of sending email and also the AspNetUsers table is updated by setting the EmailConfirmed column to 1 which means the email is confirmed for the particular user.

Conclusion
In above code we have discussed how to implement email confirmation with asp.net Core Identity in web api. Email confirmation with asp.net core identity provides a very good mechanism and methods to implement email confirmation in a very easy and simple way. Therefore most of the developers prefer to use asp.net core identity to implement email confirmation because this saves time and improves the code readablity with doing less coding.In our next article I am going discuss how to block login if email is not confirmed in asp.net core identity